
Summary
This post covers the setup of building container images with Azure DevOps that target x64 and ARM processor architectures and pushes them to Docker Hub registry. This is a continuation of the post, Docker Blazor App on Linux ARM, to support development on x64 and deploy to both x64 and ARM architectures. As described in the previous post, building docker images that targets different processor architectures like x64, ARM, and macOS provides runtime flexibility. However, the build process can be time consuming without automation which will be addressed in this post. Let’s start by reviewing the process for manually targeting x64 and ARM with the following design:

Although the source code remain the same, the setup required us to have to manually build the application for each architecture and push the build images to Docker Hub. Dual build and pushes.
This post will evolve the above manual process to an automated process using the following design.

Prerequisites
- Windows 10 64-bit on x64 architecture
- Azure DevOps
- Docker Desktop
- Docker Hub repository
- Raspbian 32-bit on ARM architecture (Raspberry Pi armv7l or lower)
Description
To distribute an application for use, we need to take a version of the source code and build it on a system processor architecture that it is targeted to run on.
| Source Repo | => | x64 Build Machine (to run on x64 machine) |
If we want our application to run on other architectures we need to repeat the build on each build machine that matches the target runtime architecture.
| Source Repo | => | x64 Build Machine (to run on x64 machine) |
| => | macOS Build Machine (to run on macOS machine) | |
| => | ARM Build Machine (to run on ARM machine) |
As there is no application code changes between the builds, the activities to build across the multiple architectures is similar and can become tedious to repeat manually.
Time has shown us that we can make and sustain application stability faster if we build and test our code changes incrementally as they occur vs. waiting for multiple changes to have been applied. This means we need to build on each source repo update referred to as Continuous Integration (CI). This best practice introduces a significant increase in build numbers that automation becomes a necessity.
To help regain the time performed in orchestrating each architecture build, we can automate our manual activities by introducing a system orchestrator to act on our behalf.
| Source Repo | <= | Orchestrator | => | x64 Build Machine |
| <= | Orchestrator | => | macOS Build Machine | |
| <= | Orchestrator | => | ARM Build Machine |
We have now automated our manual process, but what happens if a 2nd release has to be made before we have finished our first one? We cannot build two (2) releases, r1 & r2, on the same build machine at the same time. This means our orchestrator must hold r2 in a queue until r1 has finished and the build machine becomes available to take the 2nd release.
| Source Repo | <= | Orchestrator | Queue (r2) | => | x64 Build Machine (r1) |
| <= | Orchestrator | Queue (r2) | => | macOS Build Machine (r1) | |
| <= | Orchestrator | Queue (r2) | => | ARM Build Machine (r1) |
Queuing is a great option if we have time, but if we want the builds to happen faster we can have r1 and r2 build at the same time by introducing a second build machine for each architecture. This will in effect create a pool of two (2) Build Machines per architecture.
| Source Repo | <= | Orchestrator | Queue (0) | => | x64 Build Machine (r1) |
| => | x64 Build Machine (r2) | ||||
| <= | Orchestrator | Queue (0) | => | macOS Build Machine (r1) | |
| => | macOS Build Machine (r2) | ||||
| <= | Orchestrator | Queue (0) | => | ARM Build Machine (r1) | |
| => | ARM Build Machine (r2) |
If we get three (3) releases, r1, r2, r3, to build at the same time we can now choose to stay with the current configuration and let r3 wait in the queue while our pools each build r1 or r2. Or, we can add a 3rd build machine to each pool so we can get 3 builds to run concurrently.
This is conceptually the setup that we will use to make a build that target’s multiple architectures automatically. We will cover how these concepts are implemented with Azure DevOps, but they can also be implemented in other toolsets like Atlassian Bamboo orJenkins.
Let’s map the above concepts into Azure DevOps terms.
| Concept Term | Azure DevOps Term | |
| Source Repo | => | Repos |
| Orchestrator | => | Pipeline (design & runtime) |
| Queue | => | Jobs |
| Build Machine | => | Build Agent |
| Pool | => | Agent Pool |
Azure DevOps includes two (2) additional terms that was not defined in our conceptual model but that will be utilized in the coming steps.
| Self Hosted Agent | Refers to a build machine that we are hosting ourselves |
| Microsoft Hosted Agent | Refers to a build machine that Microsoft is hosting |
There is no difference in the build machine concepts, but the self-hosted version can be thought of as a Bring-Your-Own-Build-Machine (BYOBM) vs. Microsoft-hosted is provided by Microsoft. They each come with flexibility and convenience that will be highlighted.
The final part of the orchestrator responsibility is to tell the build agents to push the docker images to the Docker Hub registry. This is performed by the Azure Pipeline when it sends the job activities to the build agents.
The following steps will go through this process targeting x64 and ARM architectures.
Steps
1. Navigate to the root organization of the Azure DevOps instance. In this case https://torben.visualstudio.com and https://dev.azure.com/torben are synonymous.

2. Select ‘Agent Pools’ in left navigation pane and default agent pools should be displayed.

3. Click ‘Add Pool’ and select ‘Self-hosted’ as pool type. Enter ‘Arm32’ to indicate the architecture the build agent(s) will support and remember the name for later use in configuring the build pipeline. Description is optional for the pool. Click ‘Create’ to create the pool for holding build agent instances.

4. Click the ‘Arm32’ agent pool just created to open it.

5. Select the ‘Agents’ tab and click ‘New Agent’ to configure the first build agent.

6. In creating the agent we are downloading the agent application to install on the build machine, in our case Raspberry Pi w/ ARM 32-bit. Select the ‘Linux’ tab, click ‘ARM’ in the left navigation. Instead of downloading the file, we will get the URL to pull it later from the device. Click the ‘Copy’ button to the right of the ‘Download’ button to copy the URL to the clipboard. Save it for later reference. Take a screenshot or make note of the installation instructions to create and configure the agent on the build machine.

7. Before installing the agent, we need to also get credentials, an access token, that will allow the agent to contact Azure DevOps. This is required because instead of Azure DevOps connecting to each agent, each agent will instead connect to Azure DevOps and register itself to an Agent Pool.
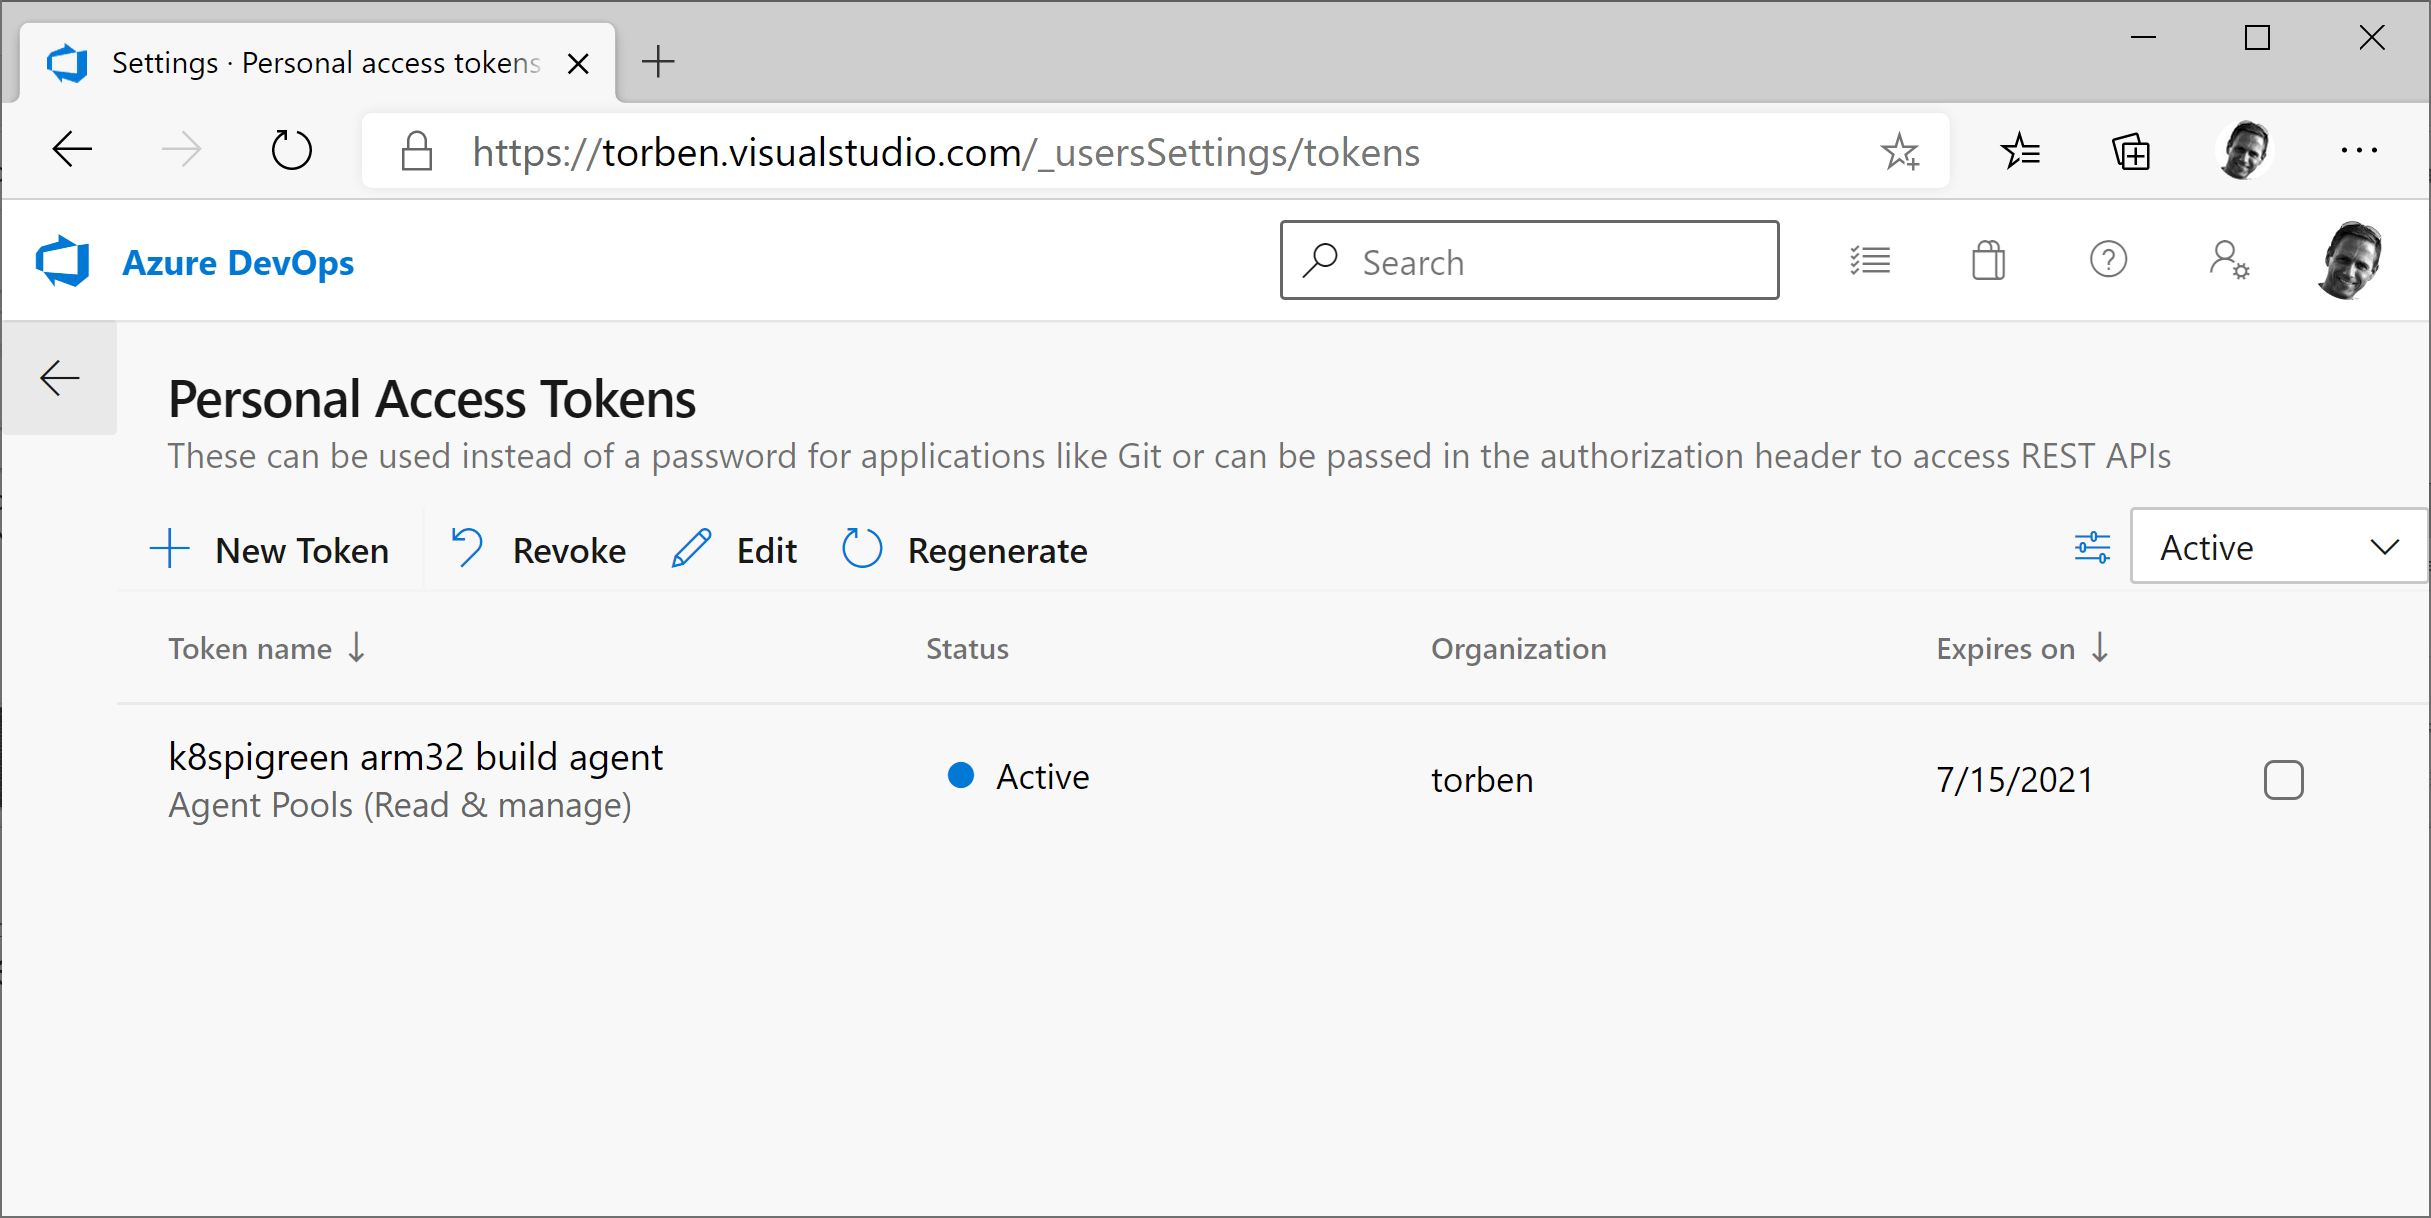
Click the ‘User Settings’ next to the user profile and select ‘Personal access tokens’

8. Click ‘New Token’ on the Personal Access Tokens screen.

9. Enter a name that describes what this access token will be used for. In this example we use ‘<raspberry pi name> <agent pool name> build agent’ for a naming convention that will, hopefully, help us remember that this token is used on a build agent and we can identify the machine and pool it was assigned.
Select the organization that this token will have access to, in this case ‘torben’.
Security best-practices ensure that we rotate the access token periodically and provides the option for a ’30/60/90/custom’ day interval. In this example, a custom date is selected for ‘7/15/2021’ where the token will expire.

10. Click ‘Show all scopes’ and check ‘Read & Manage’ under the Agent Pools scope. Click ‘Create’ and copy the access token for use in configuring the build agent.
Note: keep the access token in a safe/secret place.

11. We should now see our newly created Personal Access Token (PAT) and are ready to put it to use with our build agent.
12. Log into Raspberry Pi and execute the following commands.
$ mkdir ado
$ cd ado
$ wget https://vstsagentpackage.azureedge.net/agent/2.171.1/vsts-agent-linux-arm-2.171.1.tar.gz
$ tar -zxvf vsts-agent-linux-arm-2.171.1.tar.gz
$ ls -l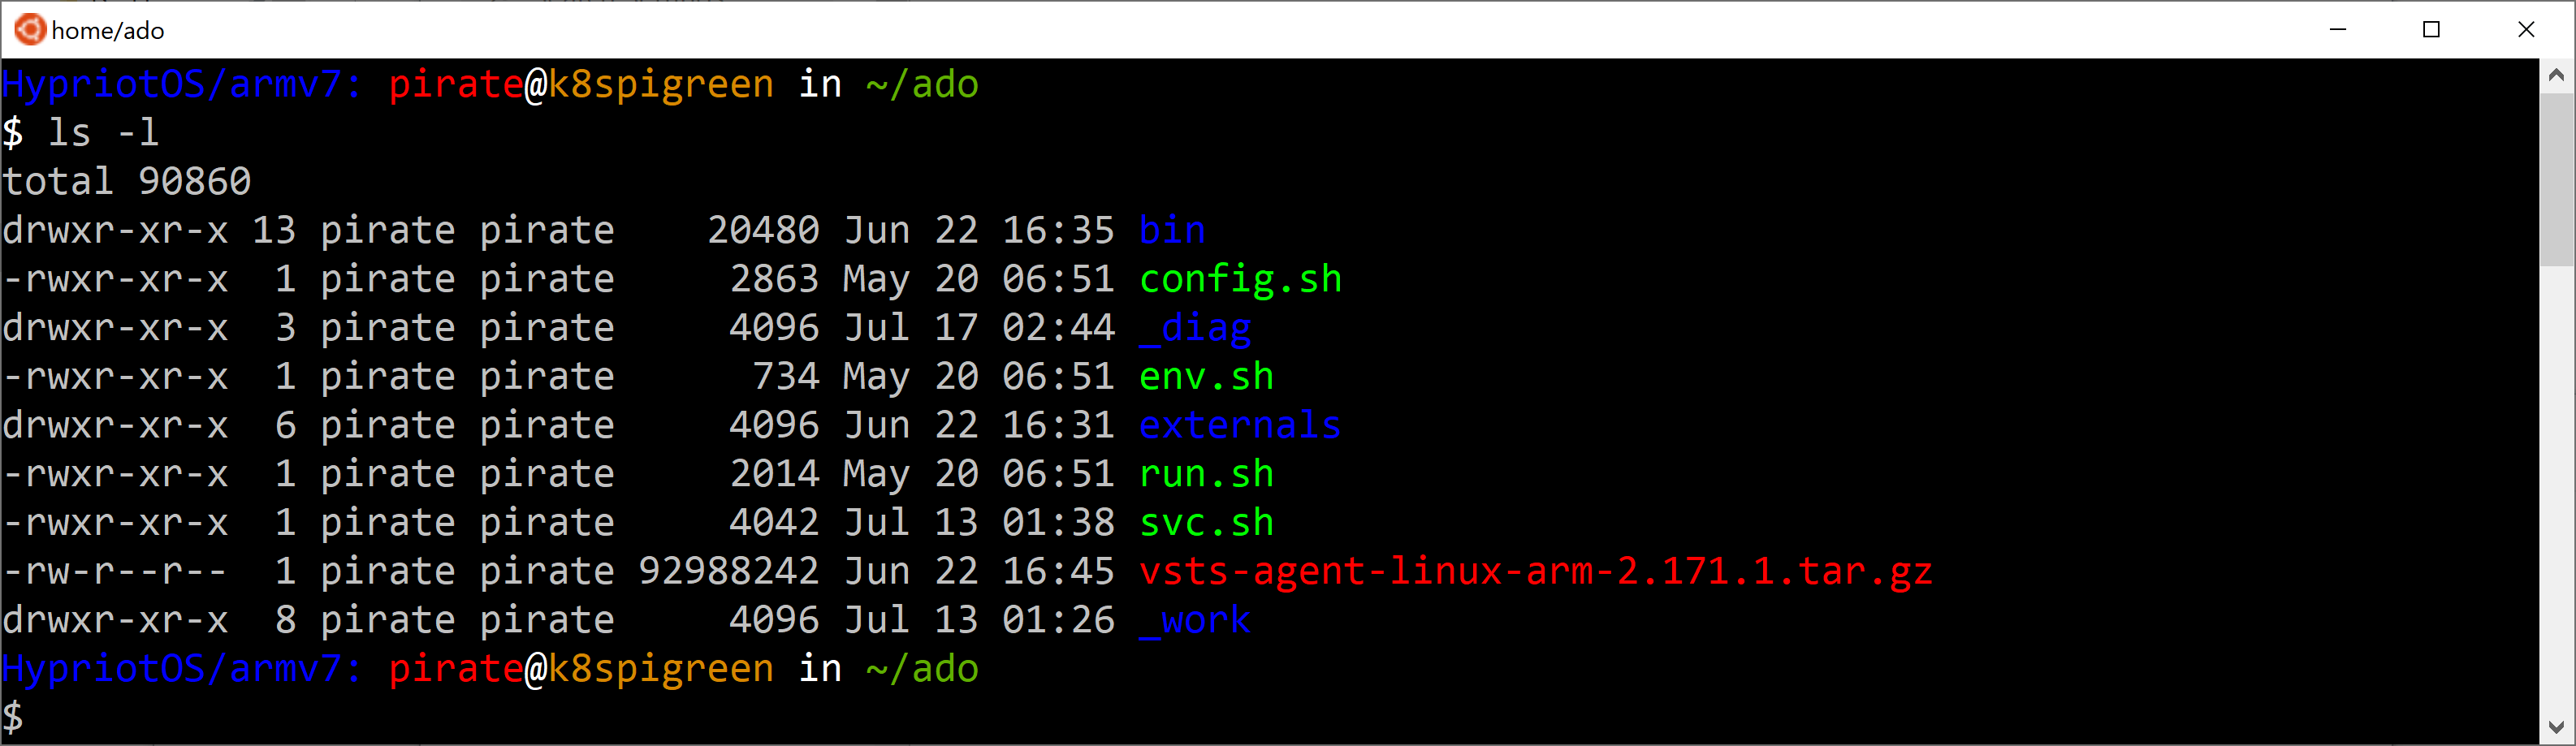
13. Execute the config command to configure the agent.
$ ./config.sh14. In the Enter Server URL, type ‘https://dev.azure.com/<organization name>’ and hit enter.
In the Enter authentication type, hit enter for defaulting to Personal Access Token (PAT).
In the personal access token, paste the token copied in step 10 and hit enter.

15. In the Enter agent pool, enter ‘Arm32’ (our Step 3 Agent Pool name) and hit enter.
In the Enter agent name, enter <machine name> (k8spigreen) and hit enter.

16. In the Enter work folder, hit enter (taking the default _work) or enter folder name.

17. Execute the run command to start the agent now that configuration is finished.
$ ./run.sh
18. Go back to the Agent Pools under the Organization Settings in Azure DevOps and we should now see our new build agent under the ‘Arm32’ pool, indicating that it is ‘Online’ and ready to take build jobs.

So far so good, we have completed the Cloud-to-On Premise configuration for Azure DevOps to talk to our Raspberry Pi running ARM 32-bit build machine. One area to highlight is that we did not have to open a firewall port for Azure DevOps to reach the build agent on our local network. Instead, the build agent connects securely outbound to Azure DevOps and holds that connection to wait for build jobs getting queued up remotely that it can pull down and build. This design helps lower the hosting complexity of the build agent while keeping the connection secure.
For the Linux x64 architecture build we could follow the same process for creating a self-hosted build agent based on that architecture. However, an alternative option that we will use in this example is to use the Microsoft-hosted build agent provided by Azure DevOps. Easy, the second processor architecture build machine is done 🙂
Now that we have the two (2) build-machines ready we have just one more pre-requisite step before we can configure and run our continuous integration (CI) pipeline. After the docker images are build we want to get them published to a docker registry. In this post, we are using Docker Hub as the registry so we need to configure a connection for Azure DevOps to tell our build agents how to connect to the Docker Hub repository and push the build images.
The Azure DevOps to Docker Hub connection is created via a Service Connection in Azure DevOps.
19. In the Azure DevOps project, go to Project Settings and select Service Connections. Click ‘New Service Connection’ and select Docker Registry.

20. Set the registry type to Docker Hub and enter the Docker Hub ID. Password & Email are optional.

21. Enter a Service connection name that will be used to reference this connection in the pipeline. In this example we name it ‘DockerHub’. Click “Verify and save”.

22. The DockerHub service connection should now be defined and available for pipelines within the project.

Done! We are now ready to put all the steps together in the final build pipeline.
For brevity, the steps for creating the pipeline has been skipped and jumps into the configuration of the multi-processor build configuration.
23. In Azure DevOps, open the Project, select Pipelines and open the pipeline YAML file that should be configured for multi-processor builds.

24. Configure the Build stage to contain two (2) parallel jobs for building both a Linux64 (Microsoft Hosted) and an ARM32 (Self Hosted) docker image and publish them to the Docker Hub registry.
# Docker
# Build a Docker image
# https://docs.microsoft.com/azure/devops/pipelines/languages/docker

trigger:
- master

resources:
- repo: self

variables:
  tag: '$(Build.BuildId)'

stages:
- stage: Build
  displayName: Build image for Linux64 and ARM32
  jobs:
  - job: BuildLinux64
    displayName: Build Linux64 on Microsoft Hosted
    pool:
      vmImage: 'ubuntu-latest'
    steps:
    - task: Docker@2
      displayName: Build image for Linux64 on Microsoft Hosted
      inputs:
        containerRegistry: 'DockerHub'
        repository: 'torbenp/helloblazor'
        command: 'buildAndPush'
        dockerfile: '$(Build.SourcesDirectory)/Hello-Blazor/Hello-Blazor/Dockerfile'
        buildContext: '$(Build.SourcesDirectory)/Hello-Blazor/'
        tags: |
          linux64.$(tag)
          linux64

  - job: BuildArm32
    displayName: Build ARM32 on Self-Host
    pool:
       name: Arm32
    steps:
    - task: Docker@2
      displayName: Build image for ARM32 on Self-Host
      inputs:
        containerRegistry: 'DockerHub'
        repository: 'torbenp/helloblazor'
        command: 'buildAndPush'
        dockerfile: '$(Build.SourcesDirectory)/Hello-Blazor/Hello-Blazor/DockerfileArm32'
        buildContext: '$(Build.SourcesDirectory)/Hello-Blazor/'
        tags: |
          arm32.$(tag)
          arm32
There are a few configuration items to call out based on our build agent and service connection configurations:
The Job names must be unique to differentiate them but can be named anything, in this case we name by the build processor type:
  - job: BuildLinux64
  - job: BuildArm32
The pools refer to the “Agent Pools” to be used to build the job.
‘vmImage’ refers to the Microsoft Hosted pool where we will be building on the latest Ubuntu version provided by Azure DevOps.
‘name’ refers to self-hosted, and we provide the pool name created in Step 3.
pool:
  vmImage: 'ubuntu-latest'
pool:
  name: Arm32
The ContainerRegistry defines the name of the ServiceConnection to the Docker Hub registry that we want the Docker Image pushed to after the build succeeds. The target registry repo will be the same for both architectures.
containerRegistry: 'DockerHub'To differentiate the architecture images from each other, we use two (2) tags per processor architecture. One tag will define the architecture and build number (linux64.buildNumber and arm32.buildNumber). The second tag defines only the architecture and will constitute the latest build for that processor architecture (linux64 and arm32).
Although there are two (2) tags per image, they will both refer to the same image when pushed to the Docker repo. The build numbered version, processor.buildNumber, is considered the immutable version and will not change from build to build. Instead, as the build number changes between builds new image versions will be pushed to the repo. The processor only tag is mutable and will be overwritten for each build so it always refers to the latest image that was build.
        tags: |
          linux64.$(tag)
          linux64
        tags: |
          arm32.$(tag)
          arm32
25. Click ‘Run’ to start the pipeline build manually.

26. View the build summary for Job status as it will start in the ‘Queued’ state waiting for build agents to accept the job.

27. Once a build agent becomes available it will dequeue the job request and start building which is indicated by the ‘running’ state.

28. Assuming no configuration or compilation errors we should end up in a succeeded state for each job.

29. If we look at the Raspberry Pi console we can see it dequeued from Azure DevOps and ran it successfully on the self-hosted build agent.

30. The final verification is going to the Docker Hub repo to see the two (2) tags that have been created per processor architecture. Notice the build number, 233, for the immutable tags are identical for each processor architecture so we can identify the pairs as additional builds occur.
The push times are 1 minute apart per architecture which is caused by the builds happening on different build agents. The Linux64 being posted 1 minute behind the Arm32 is likely caused by the Microsoft hosted infrastructure being shared across several projects and availability of an agent, whereas the Self hosted infrastructure is dedicated and idle.

Next Steps
Several steps can be taken from this point including:
- Enable Continuous Integration on the Pipeline – will ensure the build agents are triggered automatically upon a code commit to the source repo.
- Add Agents to the Arm32 pool – if more Raspberry Pi’s are required to keep build agents available based on increased build demand.
- Add macOS pool – to target a 3rd processor architecture. A third job can be added to the build stage pipeline similar to the Arm32 setup outlined in this post.
- Run Agent as a Service – instead of performing step 17 with an interactive ‘run’ command the agent comes with a script for installing it as a service so we can have it running continuously. To install as a service, run the following commands instead of Step 1. (replace ‘vsts.agent.torben.Arm32.k8spigreen.service’ with your servicename)
$ sudo ./svc.sh install
$ sudo systemctl start vsts.agent.torben.Arm32.k8spigreen.service

//Verify service is running (optional)
$ sudo systemctl status vsts.agent.torben.Arm32.k8spigreen.service
As seen in Step 3, build agents are available for many operating systems and processor architectures. The decision between Self-hosted vs. Microsoft hosted is primarily driven on build requirements and availability within the Microsoft hosted landscape. The reduced setup and maintenance requirements makes the Microsoft hosted instance the ideal starting point with the Self hosted option for greatest flexibility.
