
Summary
Blazor provides the ability to create client web apps in C#. It has both server and client runtime options which allow the developer to choose the runtime location that provides the best end-user experience. The server solution utilizes a model-view-controller (MVC) pattern with a persistent WebSocket connection for event processing. This solution lends itself well for creating Single-Page-Applications (SPA) that are heavy in backend compute/storage processing but uses less data for user view/action. For example, running analytics on the backend and visualizing results on the client. Alternatively, the client runtime model utilizes WebAssembly to offload the compute to the client as a Progressive Web Application (PWA) with offline support. This solution is great for high-performance visuals where the client-server latency could adversely impact the user experience, such as in gaming.
This post will create of a Hello-World example of a Blazor Server application. Specifically, how to package the application in a Docker image and deploy it to a Raspberry Pi running Linux on ARM. The development environment will be Visual Studio running Windows on x64 which introduces the following three (3) areas to explore:
| Area | Differences | Description |
| Operating System | Windows vs. Linux | Design-time is Windows targeted for runtime on Linux |
| Memory Address | 32 vs. 64-bit | Design-time is 64-bit operating system targeted for runtime on 32-bit operating system |
| Architecture | x64 vs ARM | Design-time is x64 architecture targeted for runtime on ARM architecture |
A few years ago this would likely have been deemed too complex and unmaintainable to sustain and forced a move to an alternative implementation. However, utilizing two (2) on-premises systems (x64 & ARM) along with two (2) cloud services, this scenario can be accomplished ‘fairly’ easily with the following end-state architecture.

Prerequisites
- Windows 10 64-bit on x64 architecture
- Visual Studio Community or VS Code
- Azure DevOps or GitHub project
- Docker Desktop
- Docker Hub repository
- Raspbian 32-bit on ARM architecture (Raspberry Pi armv7l or lower)
Description
The first question to answer is why? Building an application to run across multiple operating systems, 32-and-64 bit memory addresses, and different processor architectures sounds more like a research project than any real-life use-case. One answer is the ability in delivering solid code as a developer (yes, there are more use-cases but this post will focus on the developer ability to run and test server-based applications).
When building applications on a laptop targeted for a multi-server runtime environment it can become challenging to verify if the application behaves as expected when considering variables such as network latency, process parallelization, etc. Having a dev-cluster helps mitigate this and having one per developer provides the greatest change isolation. The public cloud has made it convenient and flexible to provision these types of environments quickly. Alternatively, with the introduction of Raspberry Pi and Single Board Computing (SBC) devices it is now possible to create a private cloud with a fairly low capital investment. Thus, the developer loop we will create is as follows:
| Developer Laptop (Client) – Local Design-and-Runtime – Windows 10 (64-bit) | ==> | Raspberry Pi (Server) – Remote Runtime – Linux Raspbian (32-bit) |
Application portability becomes a key requirement for this setup to provide a like-for-like application deployment between the client and server environments. Containerization technologies, such as Docker, is the enabling solution for this requirement. Building an immutable image that can be instantiated easily on different machines while ensuring a consistent dependency configuration is a deployment productivity boost. Although Docker helps bridge the deployment packaging for portability, this scenario has two (2) elements that makes it a little more challenging.
Challenge #1 – Kernel dependency
Containerization is an application virtualization technology, but is still dependent on an operating system kernel in order to operate. This kernel is shared across all containers to minimize the container size and memory requirements which means the operating system hosting the container is the base kernel the application must be based on. This means building an application that is based on the Windows kernel will require a Windows host to operate. Vice versa, an application is based on the Linux kernel will require a Linux host to operate.
Thankfully, the Moby Project has helped solve the challenge of running Linux containers on a Windows operating system. This means we can switch the Windows 10 Docker Desktop engine to run Linux containers to verify the container can run locally on Linux before deployment to the server. In the past, this would have created additional dependency problems using the .NET Framework on Linux. But with the introduction of .NET Core, it now includes support for Linux so changing the operating system will not impact the application code.
Challenge #2 – Processor architecture dependency
Now the kernel dependency has been solved by utilizing a Linux kernel Docker image with .NET Core we run into a mismatch challenge in processor architectures. If we build the docker image on the Windows laptop based on a Linux amd64 image it will run fine on the client laptop. Unfortunately, running this image on the ARM architecture will cause an image format exception as the processor architectures are not compatible.
standard_init_linux.go:211: exec user process caused "exec format error"To resolve this compatibility issue we need to have the base image based on the ARM architecture. However, without a hardware emulation package like QEMU, there is no ability to build the application with an ARM architecture image on the x64 architecture.
As we happen to have an ARM based device available, we can use it to build the application natively on the Raspberry Pi. This creates the following flows for building and publishing the application across the two environments.
| Windows 10 Laptop | builds | Linux x64 image |
| Windows 10 Laptop | pushes | Linux x64 Image to Trusted Registry (Docker Hub) |
| Windows 10 Laptop | pushes | Source Code to Git Repo (Azure DevOps) |
| Raspberry Pi Server | pulls | Source Code from Git Repo (Azure DevOps) |
| Raspberry Pi Server | builds | Linux ARM32 image |
| Raspberry Pi Server | pushes | Linux ARM32 image to Trusted Registry (Docker Hub) |
The result will be a single code base with two (2) deployment packages targeting Linux x64 and ARM 32-bit.

Next are the steps to guide through this process.
Steps
1. Launch Visual Studio (Community or higher), Create a new Project and select ‘Blazor App’ in the template.

2. Select ‘Enable Docker Support’ in the options and ‘Linux’ as the target environment.

3. Once the project is open, navigate to the Pages folder and open ‘Index.razor’. Change the default code to the following to add a small amount of code that shows the runtime operating system, memory address, and architecture of the device.
@page "/"
@using System.Runtime.InteropServices;

<h1>Hello, world!</h1>

Welcome to your new app.
<p />
Running on: <b>@Environment.OSVersion (@GetOSBit()-bit on @GetArchitecture() architecture)</b>

<SurveyPrompt Title="How is Blazor working for you?" />

@code
{
    private int GetOSBit()
    {
        return Environment.Is64BitOperatingSystem ? 64 : 32;
    }

    private string GetArchitecture()
    {
        switch (RuntimeInformation.OSArchitecture)
        {
            case Architecture.Arm:
            case Architecture.Arm64:
                return "ARM";
            case Architecture.X64:
                return "x64";
            case Architecture.X86:
                return "x86";
            default:
                return "unknown";
        }
    }
}
4. Open the ‘DockerFile’ and verify that the multi-stage build is based on the Linux amd64 images.
Note: version number may be different but can be verified in Docker Hub for ASP.NET Core 2.1/3.1 Runtime and .NET Core SDK.
...
FROM mcr.microsoft.com/dotnet/core/aspnet:3.1-buster-slim AS base
WORKDIR /app
EXPOSE 80
EXPOSE 443

FROM mcr.microsoft.com/dotnet/core/sdk:3.1-buster AS build
WORKDIR /src
...
5. By default, Docker Desktop will be configured for Windows Containers. As we targeted Linux in the setup, click the docker icon in the system tray and ‘switch to Linux containers’.

6. Build and Run the application as ‘Docker’ and we should see a screen similar to below that we are running on a Unix compatible operating system (Linux), 64-bit memory addressing and on an x64 architecture.

7. Optional – to see multi-platform capabilities of ASP.NET Core, change the runtime environment from Docker to ‘IIS Express’ in Visual Studio and run the application again. Notice that the operating system now reflects running on Windows 64-bit without any code changes to the application.

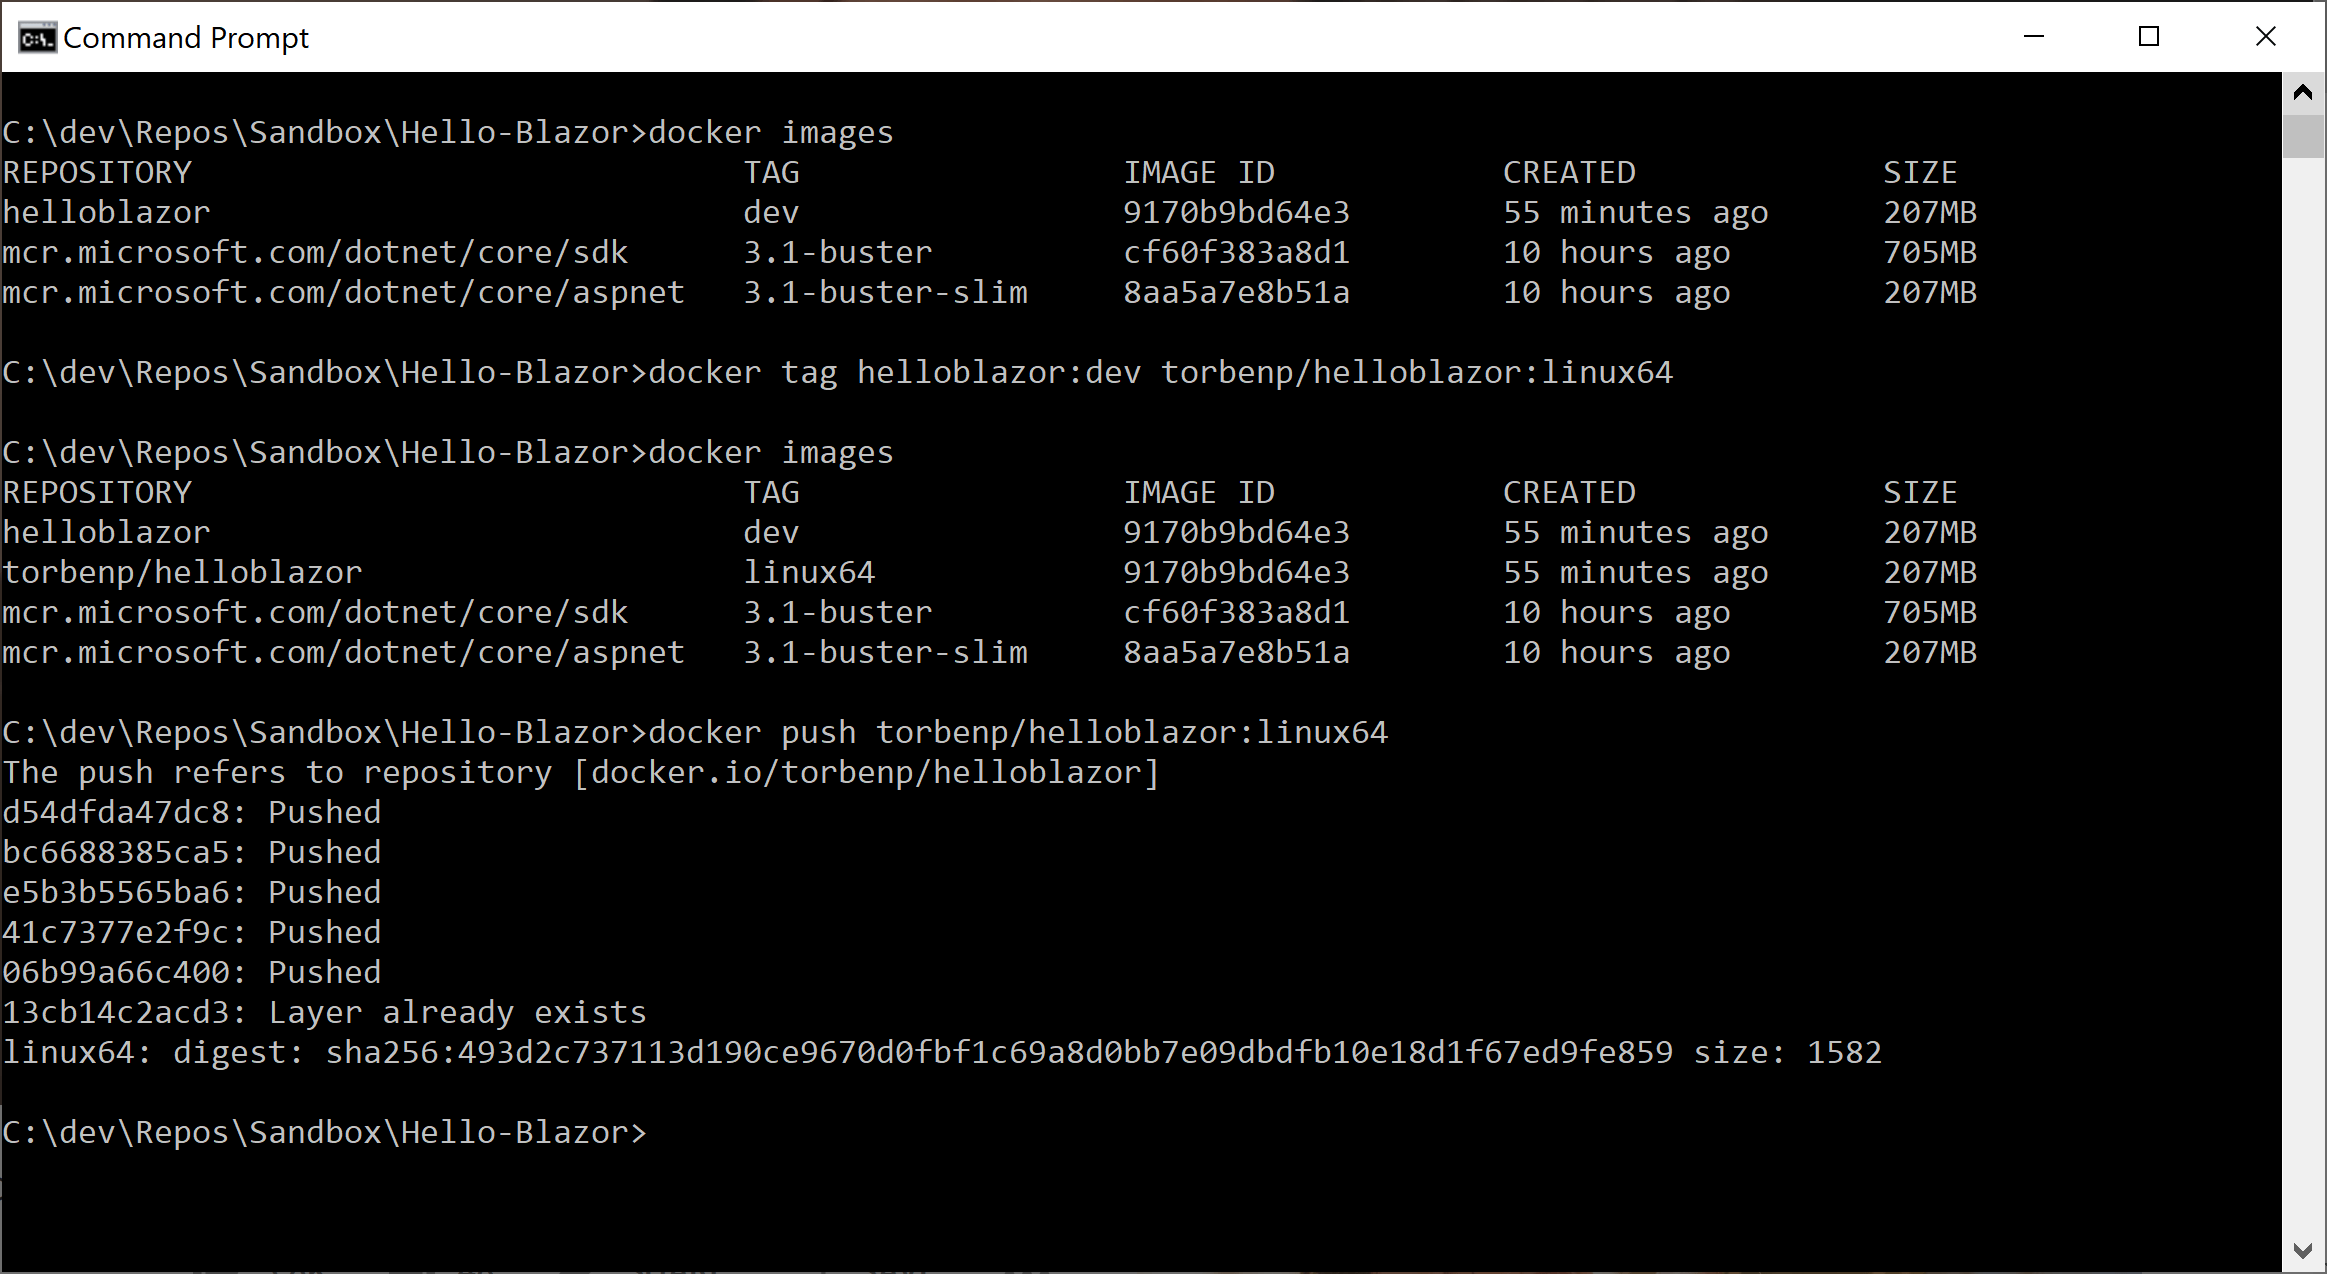
8. We should now have a dev tagged image in our local docker images repository that can be re-tagged for the Docker Hub repo and pushed to upload to Docker Hub.

9. At this point, we can commit and push the source code to Azure DevOps as the source code management (SCM) system. For brevity, this step has been omitted and for the scope of this post could be substituted for any other SCM system, such as GitHub.
10. Let’s turn to our server, Raspberry Pi, and run the Docker image just build, helloblazor:linux64, to see what happens.
Note: the image is pulled successfully, but fails to run with the error “exec format error” due to the architecture mismatch.

11. To build the ARM architecture image, we will need to install git, clone the source, and update the Docker multi-stage image to be compatible with ARM 32-bit. The following commands can be executed on the Raspberry Pi.
$ sudo apt install git
$ git clone https://<scm repo path>
$ vim <path>/Dockerfile
12. Edit ASP.NET Core and .NET Core SDK images to use arm32v7. In this example, we comment out ‘#’ the previous Linux amd64 images and substitute with arm32v7 images.
...
#FROM mcr.microsoft.com/dotnet/core/aspnet:3.1-buster-slim AS base
FROM mcr.microsoft.com/dotnet/core/aspnet:3.1.5-buster-slim-arm32v7 AS base
WORKDIR /app
EXPOSE 80
EXPOSE 443

#FROM mcr.microsoft.com/dotnet/core/sdk:3.1-buster AS build
FROM mcr.microsoft.com/dotnet/core/sdk:3.1.301-buster-arm32v7 AS build
WORKDIR /src
...
13. Build the docker image and run it.
$ docker build -f ./Hello-Blazor/Dockerfile --force-rm -t helloblazor:arm32 .
$ docker run -d -p 80:80 helloblazor:arm32
14. We have now completed and verified the recompilation for switching from a x64 64-bit architecture to an ARM 32-bit architecture. The final step remaining is to re-tag and push the new architecture image to Docker Hub repo.
$ docker tag helloblazor:arm32 torbenp/helloblazor:arm32
$ docker push torbenp/helloblazor:arm32
Next Steps
As evidenced by the length of this post, this is a very long (and manual) process to repeat each time we need to make a build. This is where Azure DevOps come in to help automate the Continuous Integration (CI) pipeline of building both 32-and-64-bit versions with x64 and ARM architectures. This will be covered in an upcoming post for targeting multi-processor architectures with Azure DevOps.
For brevity, the post only covered deployment to a single Raspberry Pi instead of a full cluster. The actual runtime deployment of the ARM container image can be scaled into a full mini-cloud deployment by combining multiple Raspberry Pi’s into a container cluster using Kubernetes (K8s) or Swarm as an orchestration engine.
It is also worth mentioning that having a separate device for testing is not always required or needed (although it will likely improve the quality of software delivered). The alternative to having a physical Raspberry Pi device is to utilize hardware emulation with QEMU for multi-processor support.


